Why Compost & How to Get Started
Learn all about compost and why it's so beneficial! We break down all the different composting methods in this post so you can find the one that's right for you.
HOMESTEADINGREGENERATIVE PRACTICES
Kylie Treekin
5/13/202410 min read
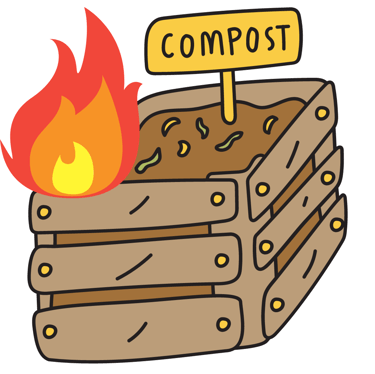
There are very bad-smelling composts, this is true. However, if it smells, it's because a cold composting method is being utilized. This leaves all the work to super acidic anaerobic bacteria that create yucky-smelling gasses as they slowly digest their food. Due to its slow metabolic rate, compost can take a whole year or even 2, to fully become soil this way. The other, much faster way of composting, is a hot method where oxygen is allowed into the combination to create a smell-free, quick breakdown in your compost. I mean it smells like dirt...but that’s only if you get real close. To be successful at composting you just need to know the recipe to follow to keep the compost cookin'!
What are some other benefits of integrating a compost system into my lifestyle?
#1 Reduction to the landfills. At this point in human history, we are attempting to store more "trash" in our environment than ever before, we store it underground, in our water, and even in space! As consumers, any time we can divert resources away from landfills it's a win for the planet. Anything that can decompose and break down organically should be allowed to do so to relieve the pressure on these waste systems.
#2 Keep the nutrients you purchase at home! When you spend money on food, there is always some form of organic waste from preparing and cooking it. By keeping those resources at your home, they will break down and become nutrients that can be used to grow more food, so your money is going even further!
#3 It feels really good to compost and it makes garden veggies taste better too! There is something so satisfying about putting your scraps in the compost, giving it a good turn, and watching it transform back into dirt right before your eyes. You feel connected to your food source like you're nurturing or giving back to your garden every time you feed it.
#4 Who doesn't like free fertilizer? Many store-bought fertilizers are expensive and synthetic. They use very specific chemicals to get an aesthetic look (in the form of color or bright fruit) for a short time without providing the actual nutrients the plants need to be healthy, strong, resilient, and full of flavor. Compost has a variety of components from our varied diets and therefore has a multitude of vitamins and minerals available that are easily absorbable because the bacteria have already broken everything down.
#5 Free food, compost systems are also mini greenhouses! I've never had a composting system that didn't grow some sort of unexpected plant. From potatoes, peppers, tomatoes, sweet potatoes, onions, chives, carrots, and celery, all sorts of plant babies will emerge from your compost and they will be personally tailored to your taste! Nature is so cool.
Ready to start composting?!
Here are all the secrets....
Myth: Compost smells really bad
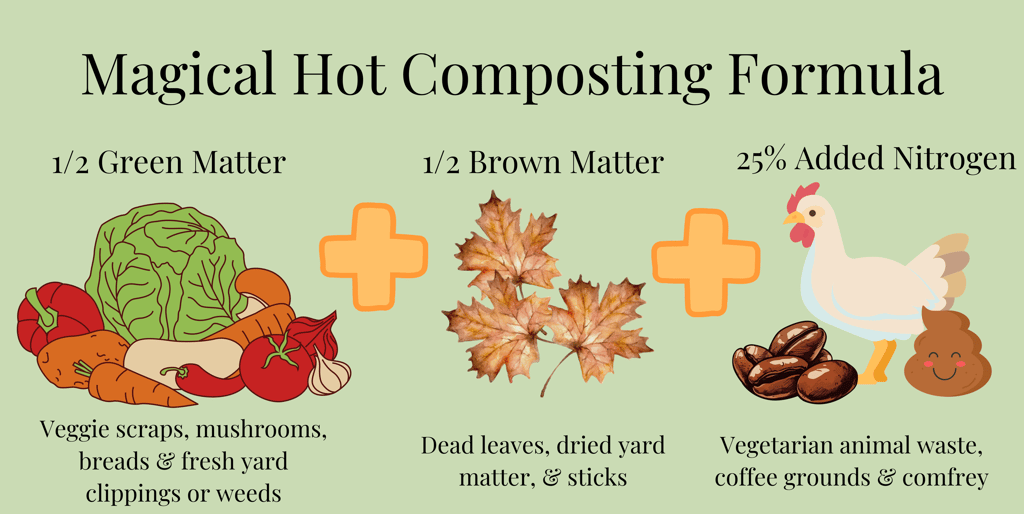
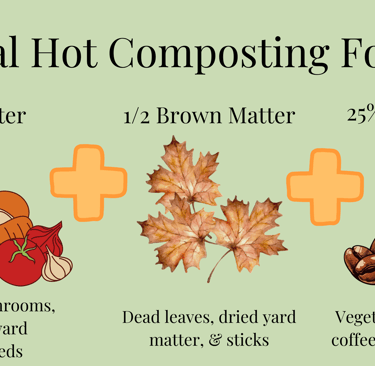
Hot Composting Formula Explained
Science Lingo: 1/2 Nitrogen, 1/2 Carbon, Oxygen & a little H2O
Eyeballing It: Equal parts Green & Brown matter, mix in up to 25% Nitrogen (see sources below) then water it to activate the mixture.
Nitrogen, Green Matter: All of your veggie/cooking scraps, including veggies that may have gone bad and food waste that does not contain meat or oils. This can also be your yard and garden waste from pulling weeds and such. Not all scraps have a high nitrogen concentration and adding additional nitrogen helps keep the system hot.
Carbon, Brown Matter: Dead dry things like; leaves, lawn clippings, pine needles or straw, and even some sticks are okay to add to keep up air circulation.
Easy Free Nitrogen Sources: Coffee Grounds (local coffee shops will save them for you or have a community pile you can take from) Chicken Poo or any vegetarian animal poo; horses, cows, rabbits, goats, etc. If you know anyone with those animals, ask them once or twice a year if you can scoop their coop and you have free Nitrogen! If none of these are options, there are plants like Comfrey and Mullein that produce enough nitrogen to substitute but might be a little more work.
Random Things That Are OKAY To Add: Stale breads, crackers, chips, grains, etc. Eggshells are great for the garden and add calcium to your compost. Cooked veggies beans or leftover noodles are okay to add as long as they don't include meat or oil.
Do Not Add: Meats or any type of grease, butter, or oil to a normal hot composting system (that's more of a black soldier fly job and not included in this post.) Things that grew from the "ground only" is my general rule of thumb. Be wary of adding items that may be heavily saturated in pesticide or herbicide (nonorganic label produce) to your compost as these will ultimately end up in your garden & your food. If you've ever heard of the "Dirty Dozen" which refers to the most pesticide-heavy commercially produced foods, would also be foods you want to avoid in your compost bin.
3 Super Easy Compost Systems
In our house, we produce organic matter every day and have quite a big output. There are things like discarded smoothie bits, vegetable bits from lunch/dinner, and the daily coffee grounds. We produce enough compost that we actually utilize two different composting systems, both of which I'll describe below. In whatever system you use, it's a very common practice across the board to have a small sealed compost container inside. It's our son's chore to take the compost to the backyard system each day, or you can take it out when it's full, either way, it will save you time and make composting easier and more accessible as you move through your day and habits.
You can go as cute as purchasing a bin like this one, clear labeling also helps house guests. Alternatively, we use a 5 gallon orange bucket with a lid for our indoor bin, if you want to get classy, paint it beautiful colors before using it! I only recommend looking for a counter bin that does NOT have holes as this will allow fruit flies to reproduce and exit the compost bin into your kitchen.
1) Purchased Compost Bin
There are so many more people composting these days that there are now several options available for purchase at your local hardware or garden store. We personally recommend ones that are raised completely off the ground with a spinning mechanism like this. Being off the ground will keep rodents out of it which can be....well, gross.
How-To Tips For This System:
For a family of 2-4 that eats a decent amount of veggies and has a small garden, you will need most likely 2 of these purchased compost bins. One will be your active compost and the other will rest. Your active compost is the bin you are adding to daily or weekly, it will need to be spun once a week as well. The rule of thumb that’s easiest to manage is, when you add green (your compost bits) also add equal parts brown (anything dried out leaves, straw, etc) then close and spin. The bigger your family is, the more greens you eat, the more bins you may need to purchase to keep this active/rest pattern working for you. Resting bins will still need a spin once a week and will rest for up to 6 weeks total - check it to makes sure it's not too cold or dry. If it is, add some water and/or nitrogen. It's finished when there are no discernible chunks and everything looks like soil.
2) Vermiculture Composting
Vermicompost is taking the composting power of the little ol' red worm, a type of earthworm that specifically breaks down organic matter, and packs it into a super comfy worm home that produces top-notch compost quickly. We have a 5 gallon set up and they can compost up to 1 pound of scraps a day. You can purchase prefabricated systems like ours which we've had for 5 years and is still working great, or can build your own out of materials you can find. Last but not least, you will need to source some worms, the most popular shipper of red worms is Uncle Jim's Worm Farm.
Benefits of Worm Composting
Quick easy turnaround.
No stinky-smelling odors (if everything is going right).
Quick and easy compost tea to water all of your plants whenever you need. Great for transplanting and fertilizing the yard.
Anywhere you use the compost products from your bin (including compost tea) you will be spreading worm casings into pots, garden beds, and yards. They will grow and slowly start transforming the health of the soil for you!
3) DIY Compost Piles & Systems
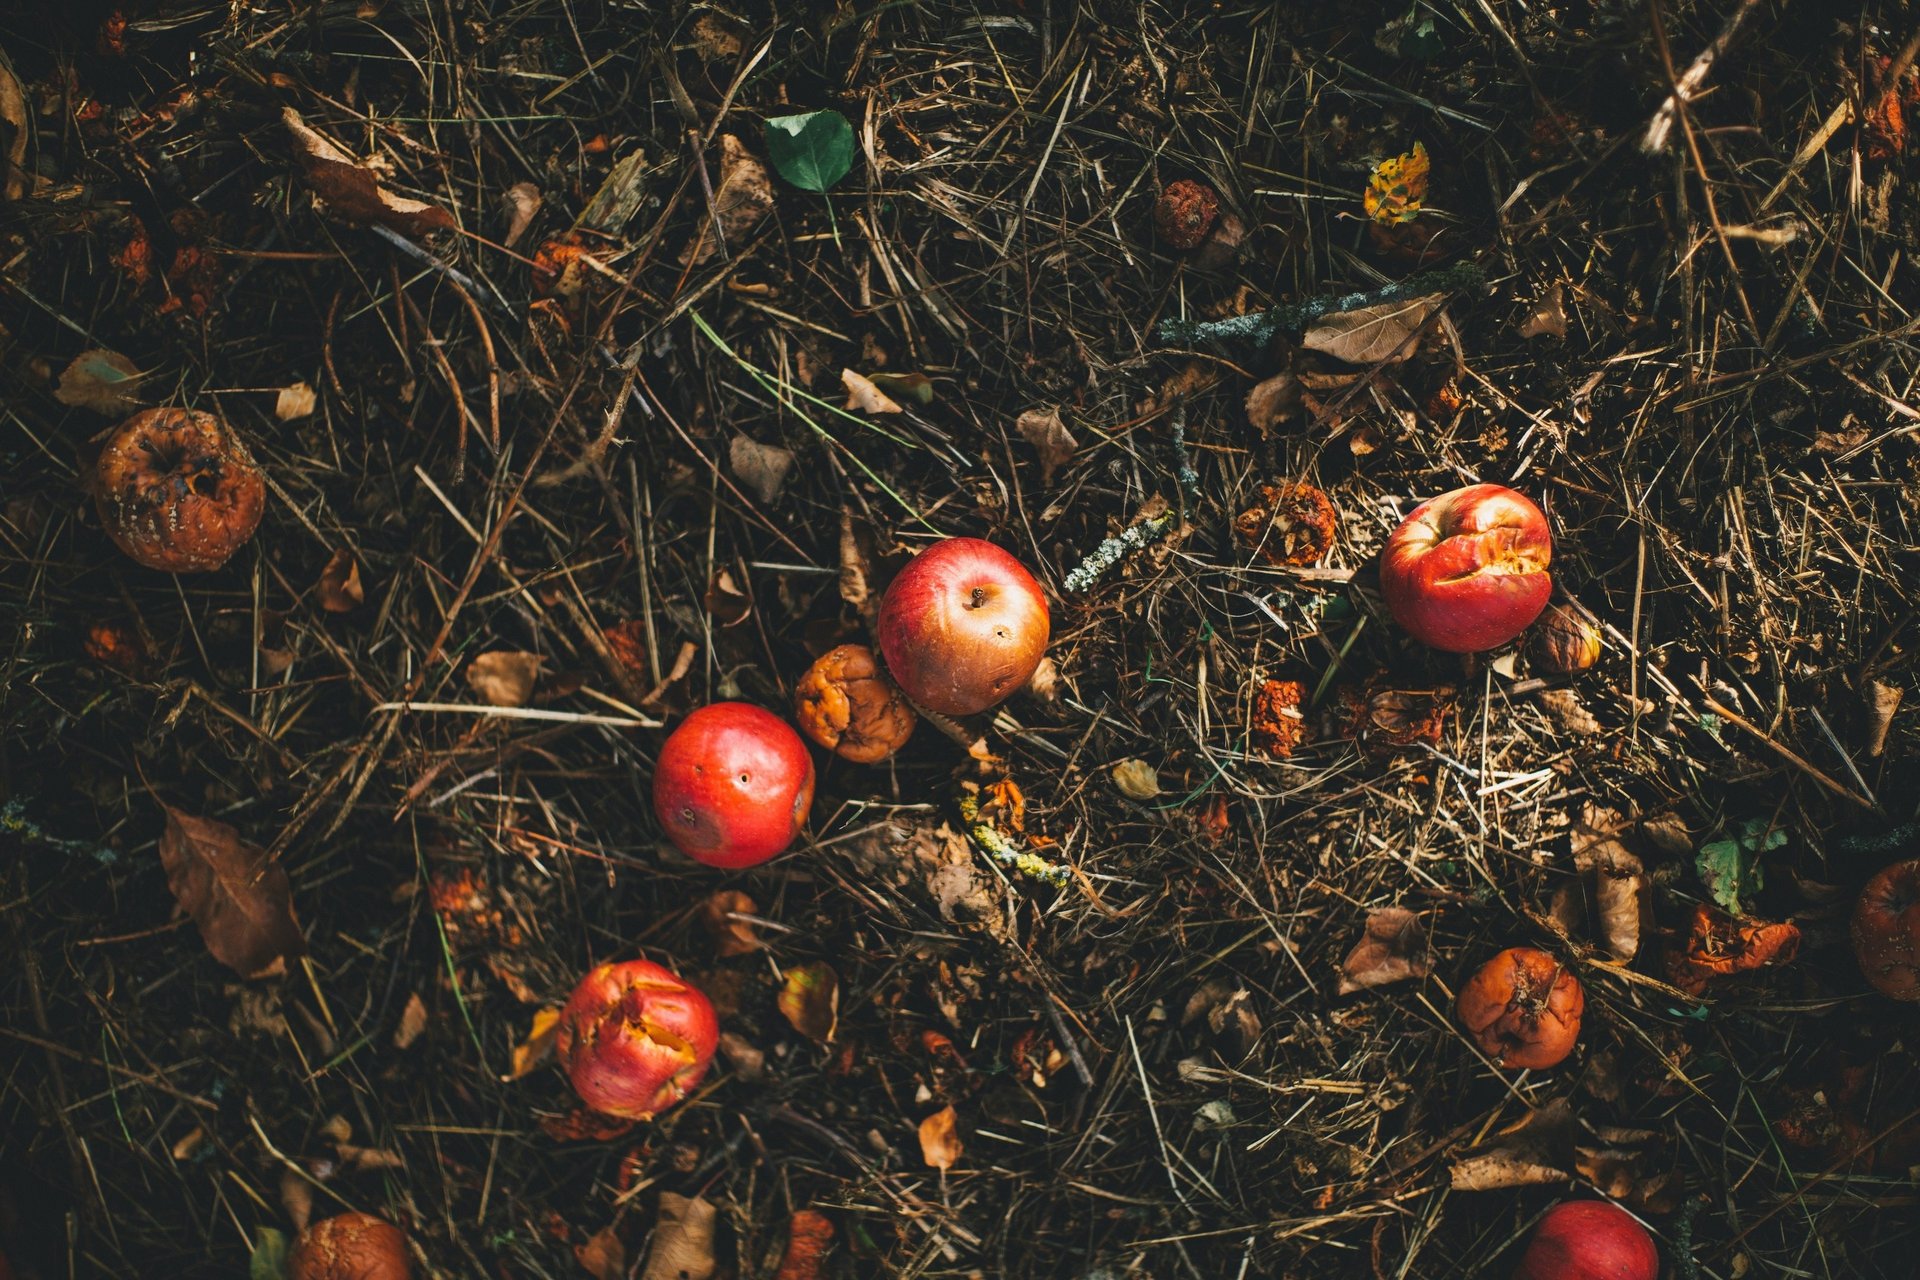
If you have space for an actual compost pile, meaning the compost will likely be in contact with the ground - these types of systems work best for people with large farms, gardens, and families. Gardens tend to produce their own amount of compost with inedible bits, by weeding or just normal end-of-the-season turnover. Having a ground pile is extremely useful for high volumes of plant matter. I will outline the 3 easiest systems to build with a variety of materials and provide you with resources to help pick the best setup for you.
Tip: Pick a compost arrangement based on the size of your plant matter needs. A good system will work well with you and should take into consideration how much time you have to spend on the whole process.
Frame & Go Method - This method I used very successfully when managing a full production farm with about 2500 sq ft of plantable space. This is also a great design if you have a property that produces tons of leaves. It’s easy to set up and requires very little materials but keeps things a little more tidy than a pile on the ground.
Create a circle out of chicken wire directly on top of the ground. Make it as big or as small as you need.
When you have it to size, cut away the extra and then twist the cut ends around the beginning of the circle to close it up.
If you feel like it needs support, add a couple of metal stakes to the frame to keep it in place.
To stir & mix these piles, a wheelbarrow upside-down does the trick to act as a stool if you don’t have one. Simply crawl into the pile and mix with your shovel.
When ready to empty the bin - simply cut the twisted fastening to release your pile and spread with ease.
Wooden or Pallet Compost Boxes - If you want to not look at your compost pile every day (they aren’t the prettiest) you might consider hiding it behind a wooden structure of sorts. There are tons of methods usually found by googling “DIY compost bin” but I think if you can find food-grade pallets, this is the easiest cheapest material to utilize.
Pick a design, I really love the 3 bin system like this. You can add as many additional bins are you need and use the most readily available materials. Here are some more designs for DIY bins.
There are no wrong designs, but again you want this system to be easy for you to use, or as a normal human, you won’t. Keep this in mind when making your final choice.
Built it and start composting! Ask for help from a crafty friend if you need access to tools you may not have. Promise them a little future produce for their time!
Pile of Compost - Now this is the real old-school method, where you simply build a pile. This is also a really great way to compost a very large amount of organic matter. This will be the HOTTEST method and is suitable for processing organic meats, enough to compost a whole livestock animal’s body in the center, creepy, but true. If you have a large enough farm to own a tractor, this is probably the method you are going to go with. A tractor makes very quick work of the following process.
Additionally, if your compost ever does get stinky or the ratio doesn't seem right when you've used a different method, a pile like this can always be built to correct and rework your compost. If done right, this method can break down compost into dirt in 1 month with regular turning once a week.
How-To Tips For This System:
When turning over and mixing any one of these piles always turn from the inside out, so that the material that was on the inside (center) is now on the outside and the stuff that was on the outside gets to cook a little better in the middle.
The best way to use this method on a large scale is to have multiple dump locations for each material in the “Magical Hot Composting Formula”. That means, building a green matter pile (all live matter) a pile for brown matter (dead dry stuff), and a pile for nitrogen (vegetarian animal poo or coffee grounds). Sometimes you can have your brown and nitrogen mixed if you are using discarded chicken litter for example.
The smallest pile we recommend building with this method is 1 cubic yard of organic matter. If you are in an area experiencing drought, be careful not to build your piles too big (more than 10 yards), or moving the materials around with a tractor could cause grass fires with the heat. Smaller piles can be built but the smaller the pile, the more care you will need to pay to the rations to keep it hot enough.
Keep an eye on the moisture & oxygen level in your compost, you don’t want it to dry out or it won’t break down properly, we water our compost once a week when we water the gardens. If it gets thick and gloppy while mixing, there is not enough oxygen and needs more sticks or might have too much water.
Make sure to follow the “Magical Hot Composting Formula” as best as you can. When in doubt, add nitrogen. When you go to turn the compost, if it is not producing enough heat to break things down, simply add more nitrogen then, if it gets too hot, add more carbon (brown matter).


Thanks for reading and Happy Composting!